10 Stunning DIY Outdoor Halloween Decorations That Impress
Every autumn, I look forward to creating unique DIY outdoor Halloween decorations to give my front porch a fresh, exciting update. My home has a fairly compact yard, so I cannot fill every corner with oversized props. Instead, I focus on creative handmade projects that make a big impact in a small space. Over the years, I have painted pumpkins, built glowing lanterns, hung floating ghosts, and even shaped my own tombstones. Some projects worked better than others, but each one taught me something useful about outdoor decorating.
The best part about DIY outdoor Halloween decorations is that they rarely require expensive supplies or advanced skills. A few pumpkins, spare wood, outdoor paint, rope, and battery-powered lights can transform a porch in a single afternoon. Many of these projects reuse items already sitting in a garage or storage closet. In this guide, you will find ten creative, budget-friendly ideas that welcome trick-or-treaters and impress every neighbor who walks past.
How I Built a Pumpkin Display That Looks Full, Not Crowded
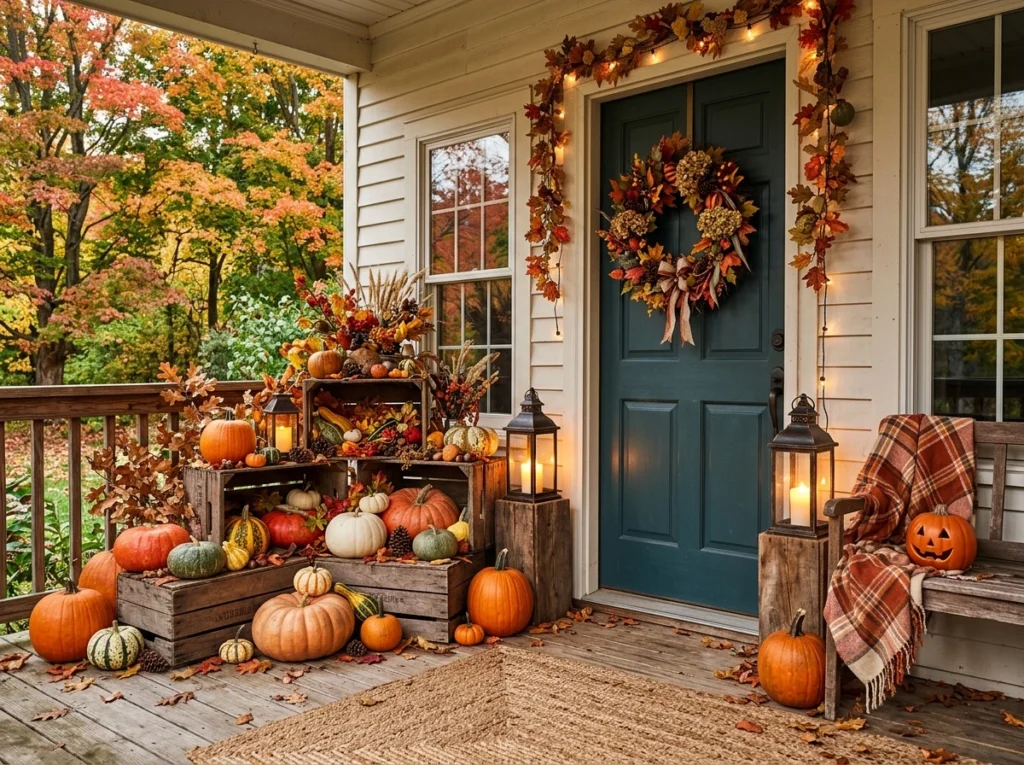
A pumpkin display is one of the simplest ways to decorate outdoors, yet stacking random pumpkins rarely looks intentional. I now build every display in layers instead of piling pumpkins together randomly. Larger pumpkins sit toward the back, medium ones fill the middle, and small gourds line the front edge. Mixing different heights creates depth without needing any extra floor space.
Last year, I combined a few real pumpkins with several faux ones that I can reuse every season. Faux pumpkins cost more upfront, usually around 8 to 10 dollars each, but they pay off over multiple years of decorating. For narrower porches, a couple of wooden crates work well as simple risers underneath the display.
To build a similar layered display, gather these basic items:
- A mix of real and faux pumpkins in different sizes
- Two or three wooden crates or sturdy boxes
- Pinecones and dried leaves for filling gaps
- A few small battery-powered lanterns
This same layering trick works beautifully for indoor Halloween home decor too, not just outdoor porches and entryways. You can easily use this exact styling approach when organizing shelves, side tables, or cozy decorative corners inside your home to make the space feel warm and inviting.
Budget tip: Dollar store gourds work just as well as expensive faux pumpkins once mixed in with real ones.
How I Made Friendly Ghosts From Old Bed Sheets
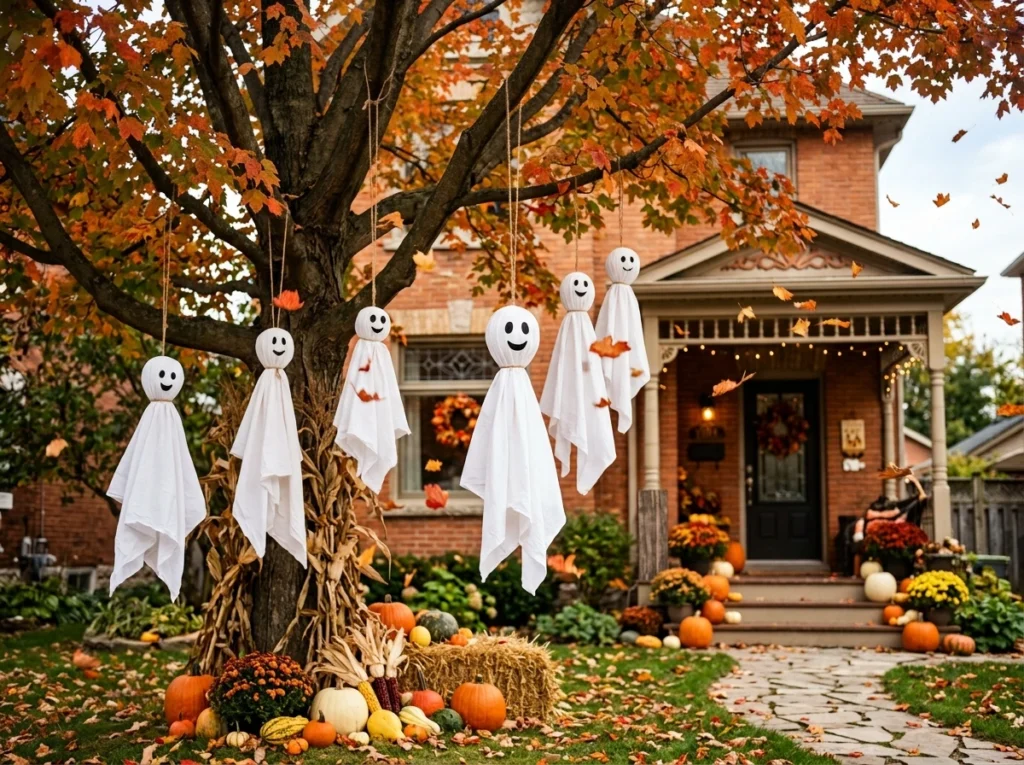
One of my favorite low-cost projects started with an old white sheet I almost donated. My first attempt looked more like a lumpy blob than a floating ghost. After loosening the fabric and trimming the uneven edges, the shape finally looked natural and light. Now I always leave extra fabric room instead of pulling everything tight.
To make your own simple ghosts, you will need the following supplies:
- One or two old white sheets or pillowcases
- A lightweight ball or crumpled paper for the head shape
- Thin fishing line for hanging
- Black felt scraps for the eyes
- A hot glue gun
I hang each ghost at a slightly different height so they appear to float independently in the breeze. This entire project cost me less than 15 dollars, since most materials were already at home.
Budget tip: Crumpled newspaper wrapped in tape works just as well as a foam ball for the head shape.
Why I Paint Pumpkins Instead of Carving Them
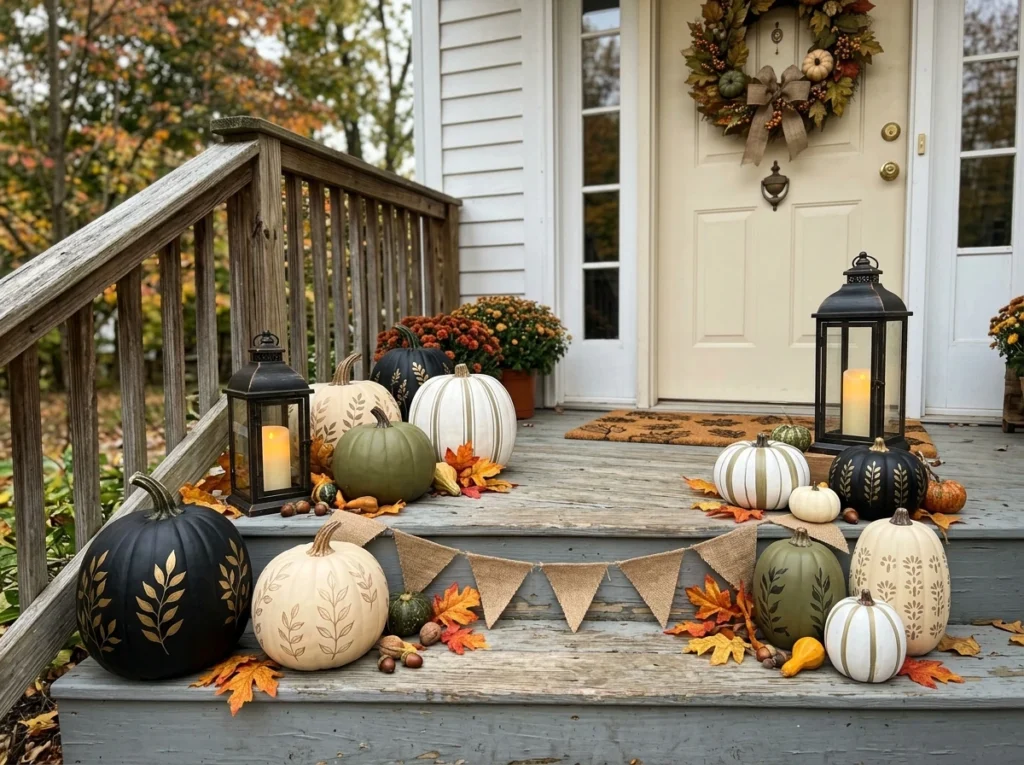
Carved pumpkins look great for only a few days before they start to sag and wrinkle. Painted pumpkins last through the entire season with barely any noticeable wear. I usually choose muted colors like matte black, warm cream, or soft olive green. Simple designs, like small stars or subtle stripes, look far better than busy, detailed artwork.
My painting supply list stays short and simple every single year:
- Faux or real pumpkins
- Matte outdoor craft paint in two or three colors
- A plastic-bonding primer
- Small foam brushes
My biggest early mistake was skipping primer before painting a glossy faux pumpkin surface. A cheap plastic-bonding primer, costing around 7 dollars a bottle, solved the problem completely on every pumpkin since then.
Budget tip: Craft store paint sold in small bottles works fine and rarely costs more than a few dollars each.
How I Built DIY Lantern Displays for Evening Curb Appeal
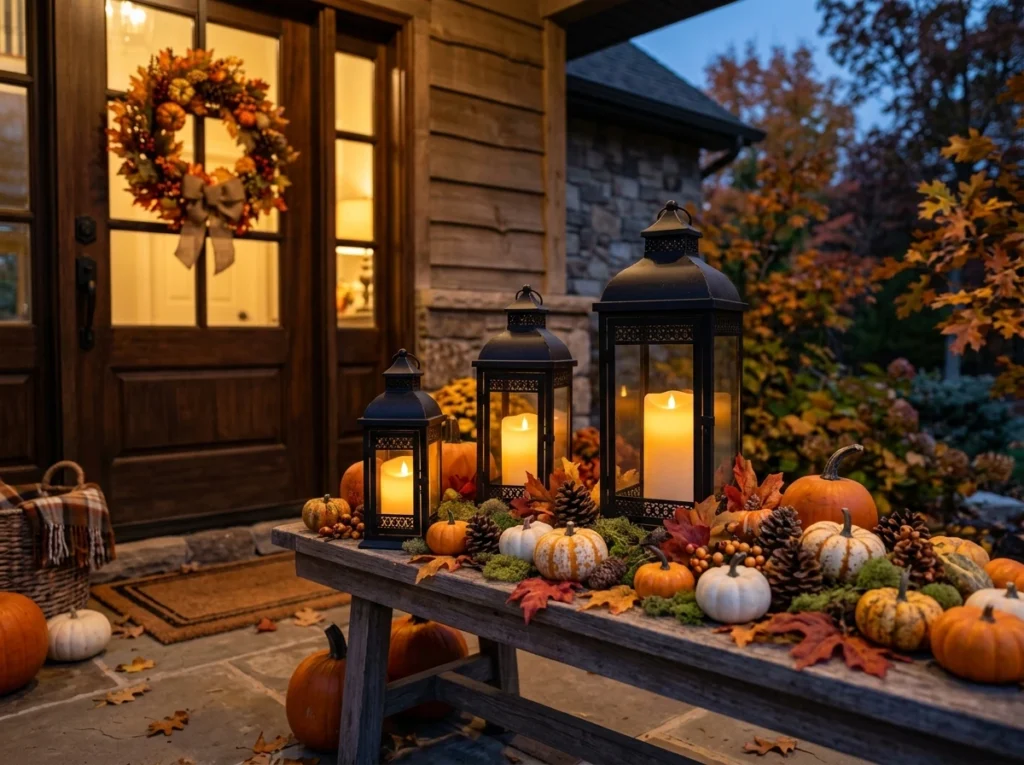
Outdoor lighting genuinely changes everything about a display once the sun goes down. Instead of one bright floodlight, I prefer several small pockets of warm, glowing lighting. I usually group three lanterns together near the front entrance for the biggest visual impact. Battery-powered candles with built-in timers, usually sold in packs for about 20 dollars, turn on automatically every evening without any extra effort.
A simple lantern grouping only needs a few basic pieces:
- Three matching outdoor lanterns
- Battery-operated candles with a timer feature
- Mini pumpkins or faux moss for the base
- Small artificial branches for extra texture
Surrounding each lantern with mini pumpkins, faux moss, or small branches adds extra texture and charm. One weekend, I tried gluing tiny wooden bats around a plain lantern base for detail. Measuring the gaps carefully the second time made the finished lantern look far more polished.
Budget tip: Plain glass jars from the kitchen work as lanterns once wrapped loosely in black tissue paper.
How I Built Lightweight Tombstones That Survive Wind
Foam insulation board works far better than cardboard or plywood for outdoor tombstones, and one large sheet usually costs about 14 dollars. It stays lightweight, cuts easily with a simple utility knife, and holds paint well. My first cardboard attempt folded over completely after just one windy afternoon outside. Switching to foam board solved that stability problem almost immediately for every future project.
Here is everything I use to build a full set of tombstones:
- One or two foam insulation boards
- Gray and black exterior paint
- A utility knife for cutting shapes
- Wooden stakes and strong construction adhesive
After cutting the tombstone shapes, I painted them with leftover gray exterior paint from another job. Attaching each piece to a wooden stake with strong adhesive keeps everything upright during windy nights.
Budget tip: Leftover paint from a previous home project works just as well as buying a brand new can.
How I Crafted a Giant Spider Web for My Porch
A giant spider web looks expensive from the street but actually costs very little to build yourself. It also works well for smaller porches, since the design draws attention upward instead of outward. Last October, I stretched thick white rope across one corner of my porch railing. My first attempt sagged badly after a single windy evening outdoors.
Building a sturdy web only requires a handful of simple materials:
- Thick white rope or outdoor twine
- Heavy-duty zip ties
- A large plastic spider
- Scissors
I removed the entire structure, switched to heavy-duty zip ties, and kept every line under real tension. I recommend starting with the main support lines before weaving smaller circles between them.
Budget tip: Painting a shiny plastic spider with matte black spray paint makes it look far more realistic.
How I Turned Old Planters Into Halloween Displays
If you already have flower pots sitting on your porch, do not store them away yet. After removing summer flowers, I filled my old planters with faux black branches and small pumpkins. Dried ornamental grass and a few pinecones added extra texture without costing very much money. The finished arrangement looked far fuller than I originally expected from such simple materials.
My planter refresh usually includes just these few items:
- Existing outdoor planters or pots
- Faux black branches
- Mini pumpkins and pinecones
- Battery-powered string lights
Dry climates can damage fresh branches quickly, so I mix natural stems with a few artificial ones. Taller branches also make a small porch feel decorated without blocking the walkway underneath.
Budget tip: Discount store floral picks, often under 5 dollars each, work just as well as pricier options.
How I Made Floating Witch Hats With LED Lights
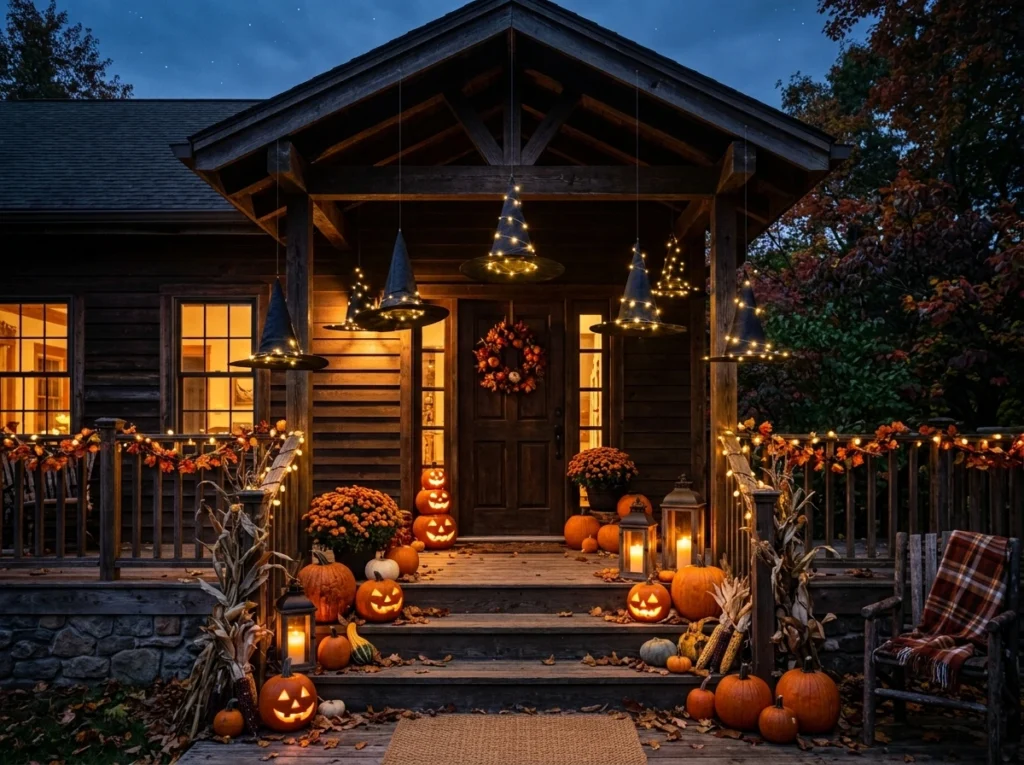
Floating witch hats have become one of my most requested DIY outdoor Halloween decorations. The idea is far easier to build than most people initially expect it to be. I wrap small battery-powered fairy lights around the inside of each black witch hat. Hanging every hat at a different height using fishing line creates a natural, floating effect.
The full material list for this project stays short and affordable:
- Three or four black witch hats
- Battery-powered fairy lights
- Thin fishing line
- Ceiling hooks or sturdy tree branches
During daylight hours, the hats almost disappear completely against the sky above the porch. I originally hung every hat at the exact same height, which looked flat and repetitive. Raising a few and lowering others instantly gave the entire display far more movement.
Budget tip: Basic witch hats from a discount store work fine once reinforced with a thin wire ring inside.
How I Created a DIY Halloween Welcome Sign
A handmade welcome sign instantly makes any porch feel more personal and inviting. I used a leftover wooden board, sanded the rough edges, and painted it matte black. White paint worked well for lettering, while a touch of orange tied the whole sign together. My first coat looked streaky, since the wood absorbed the paint unevenly at first.
Making a similar sign requires only a few basic supplies:
- One wooden board or thick plywood scrap
- Matte black and white outdoor paint
- A pencil and ruler for spacing letters
- Sandpaper and a thin coat of primer
Adding a thin layer of primer before painting solved that streaky problem almost completely. Pairing the finished sign with nearby pumpkins and lanterns looks better than displaying it alone.
Budget tip: Plywood scraps from a hardware store cutting bin often cost under 10 dollars.
How I Added Soft Outdoor Lighting for the Final Touch
Lighting is what genuinely ties every other decoration together once evening arrives. Rather than lighting the entire yard, I focus on just a few key areas. Warm white or amber bulbs almost always look more inviting than bright blue lighting. I rely mainly on battery-powered lights with timers, since outdoor outlets are often limited.
I place lighting in only four or five spots around the entire porch area:
- Around the front door frame
- Along the porch railing
- Inside each lantern
- Behind the ghost decorations
This approach also avoids running extension cords across a walkway where guests might trip. Always choose lights rated specifically for outdoor use before placing them anywhere outside. If you plan to add wired electrical decorations, a licensed electrician should handle that installation safely .If you want to make your entryway look even more magical, check out the best outdoor lighting ideas to create a beautiful and cozy glow that highlights all your handmade creations beautifully.
Budget tip: A single multi-pack of solar string lights often covers two or three separate areas at once.
What I Would Do Differently After Several Halloweens
Looking back, I made plenty of mistakes that taught me valuable lessons over the years. My biggest early mistake was buying too many decorations before choosing a clear theme. The porch ended up looking cluttered instead of welcoming, despite spending real time and money on it. I also once chose fabric pieces based only on how they looked indoors first.
Strong sunlight faded several cheap fabric decorations far faster than I originally expected them to fade. One unexpected hailstorm also cracked a few plastic pieces never designed for real outdoor weather. Now I always plan a color palette and measure my porch before buying anything new. Mixing a few reusable pieces with fresh pumpkins each year keeps both costs and clutter under control.
I have also learned that less cleanup in November is always worth the extra planning. Durable materials, weather-resistant paint, and battery-powered lighting save real time throughout the entire month. Most importantly, I no longer feel pressure to decorate every single inch of available space. A thoughtfully arranged porch often feels far more inviting than a yard packed with oversized inflatables.
Make This Halloween One to Remember
Decorating outdoors does not have to mean spending hundreds of dollars on store-bought displays. A handful of simple DIY outdoor Halloween decorations, a realistic budget, and a little creativity change everything. Some of my favorite pieces started as leftover garage supplies that almost went to waste. A few projects that felt like failures at first became the exact pieces I now reuse every year.
If you are planning your own Halloween decorating this season, start with just one or two projects. Build on them gradually each year instead of trying to finish everything at once. Create a display that genuinely fits your own home instead of copying someone else’s exact porch. That simple approach has made decorating one of my favorite parts of autumn every single year.
Store your favorite pieces carefully once November arrives, since good storage protects them for next season. I keep everything sorted in labeled bins so setup takes far less time the following year. A little planning now always saves both money and stress the next time October arrives.
Ready to Transform Your Space?
Now it is your turn to grab some pumpkins, dust off those old bed sheets, and start crafting! For more budget-friendly styling tips, step-by-step seasonal tutorials, and creative ideas for compact spaces, explore our latest design guides on QuickDecor today!

Amelia
Hi, I’m Amelia a passionate content writer who loves turning ideas into engaging stories. I specialize in lifestyle, home decor, and modern living topics, creating content that is both inspiring and practical. My goal is to help readers design beautiful spaces and live more stylish, organized lives. I believe in simple, creative writing that connects, inspires, and adds value every day.
Related Articles
Explore more topics in this category